How to Use Social Panels in Brandwatch: A Step-by-Step Guide
Welcome to our new video series, "Now YOUKNOW How," where we provide step-by-step guides on leveraging global martech tools to improve your data skills and more. Today we explore Brandwatch's social panels, a feature within the platform that allows users to organise and display social media data in a customisable and visually appealing manner. In this guide, learn how social panels in Brandwatch Consumer Research provide a way to create dynamic dashboards that present real-time information, trends, and insights from social media sources.
Step 1: Accessing Social Panels
- Log in to Brandwatch Research
- Navigate to the data area
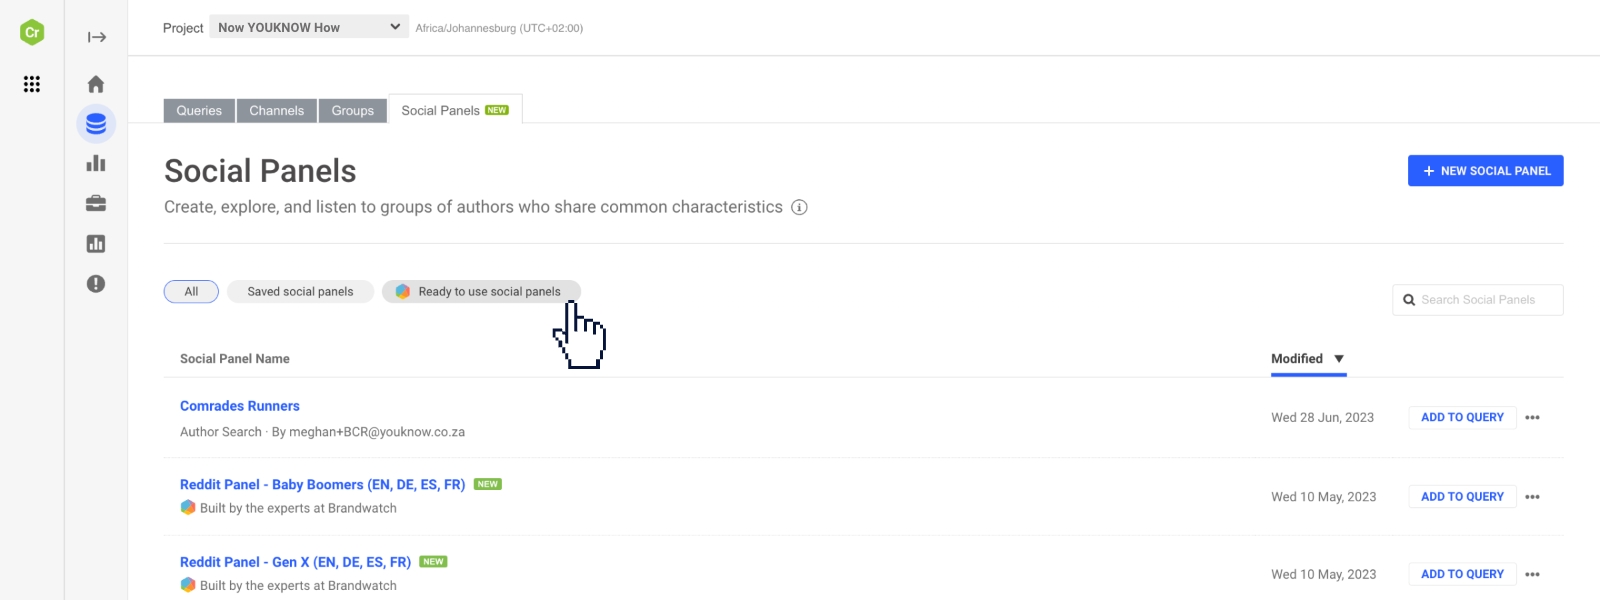
- Locate and click on the "Social Panels" option.

Step 2: Understanding Social Panels
Social panels are a feature within Brandwatch Research that allows you to segment your market into specific audiences or personas. These segments can be based on location, keywords, or personas. For example, you can focus on what South African moms say about a specific brand or topic. Social panels help you save time by zooming into the specific audiences you want to target.
Step 3: Types of Social Panels
Brandwatch offers three types of social panels:
a) Predefined Social Panels: These panels are already created by Brandwatch, covering various categories such as Gen Z, Reddit Interest, and more.
b) Saved Social Panels: Work of previously saved social panels
c) New Social Panel: This is where you can create your customised social panels based on your specific criteria.

Step 4: Creating a Social Panel
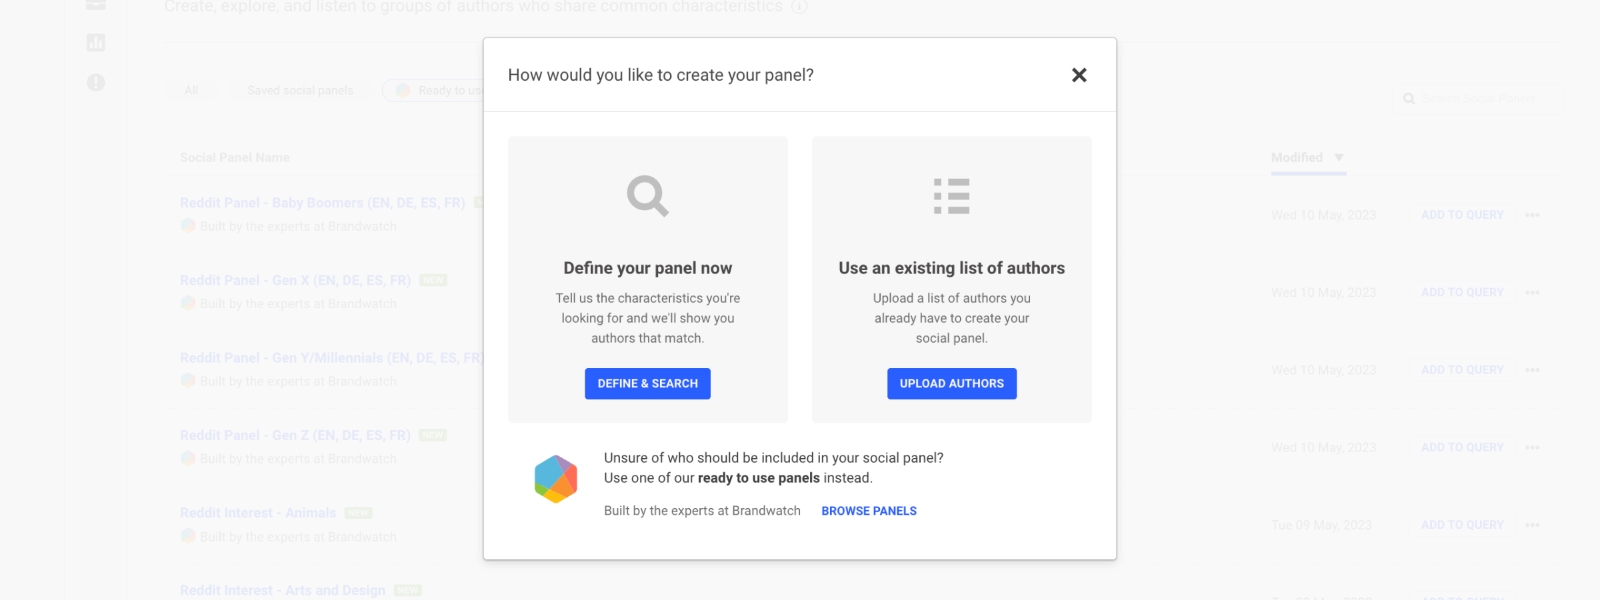
To create a social panel, you have some options:
a) Upload an existing author list.
b) Download an audience list from Brandwatch and re-upload it.
c) Define your search criteria.

Step 5: Defining Search Criteria
- One effective method is using buyer content, particularly Twitter bios.
- Determine specific keywords or phrases you want to search for, such as "comrades."
- Consider variations in spelling, if applicable.
- You can add additional criteria, like location, to narrow down your search.
- Be cautious not to make your criteria too narrow or too broad.
Step 6: Refining the Social Panel
- Review the search results to ensure they align with your desired audience.
- Exclude any specific authors or accounts that are irrelevant to your analysis.
- Apply additional filters, such as account type (individual or business), if necessary.
Step 7: Saving the Social Panel
- Once you're satisfied with the social panel, save it for future use.
- Give your social panel a name that reflects its purpose, e.g., "Comrades Runners or Enthusiasts."
- Click on "Save and Close" to complete the process.
Step 8: Utilizing the Social Panel
- With your social panel created, you can now integrate it into your queries.
- Explore the insights provided by the social panel, such as top professions, interests, gender distribution, and more.
- Leverage this information to better understand the specific audience you've targeted.
Congratulations! You have successfully learned how to use social panels within Brandwatch Research. By creating and applying social panels, you can effectively segment your market, save time, and uncover valuable insights. Remember to regularly review and refine your social panels to align with your changing research needs.
If you want to watch this step-by-step tutorial, head to our Youtube channel: Now YOUKNOW How | How to build personas in Brandwatch using Social Panels.
📱 If you want to learn more about Brandwatch, connect with our experts here.
💬 If you want us to make a tutorial on something specific, comment on our LinkedIn post here.
.avif)

.png)

